INSURANCE PAPER CLAIMS
In this section of the manual we will cover how to handle the processing of the printing of insurance forms this will include Primary and Secondary Insurance carriers. The system also has the capability to send Inquiry letters to the Insurance companies, without the need for you to create a letter, the insurance inquiry letter is already programmed into your system, this is later explained in the System reports sections of the manual. You may choose to do your insurance billing periodically or daily, as you deem necessary for your practice. Regardless of the internal time in which you would like to process the forms for your practice, you will see the speed and affectivity of having the system process all the insurance billing for you. Electronic, claims submission is later explained in his manual, please refer to Online Transmission section of this manual. These are just a few of the benefits that your practice will receive for automating the insurance claims processing department. The Paper Claims column in the package consist of the following:
I. Print Claim Forms from a selection of services.
II. Print Claim Forms for Secondary Carrier
III. Print An Individual Claim
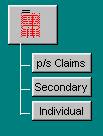
Figure E.1
I. Print Claim Forms from a selection of Services
To print paper claims of insurance companies in your practice, from the main screen of the program click on the button that reads “p/s Claims” in the paper claims column of the program. Once you have selected this option the system will bring up a “Print Claim forms” screen asking you some questions so that the system can print insurance forms for the patient services that match the criteria of your selection. Lets go over the questions you will have to answer to let the system know which are the claims you wish to print.
Enter Ids separated by commas
Enter the ID numbers, separated by comma, of the patients whose form you wish to print. Otherwise, if you wish to print forms for all patients that have transactions within a certain period of time leave this field blank and the system will search based on the rest of the criteria specified hereafter.
Enter Starting Date
Self-explanatory. This is a self-formatting date field, which is prompting for the beginning date of the period of time for which you are requesting the selection of services posted to the patients account.
Example: You want to select all transactions with an effective posting date ranging from 5/5/89 through 5/10/89. Your entry here will be:
ENTRY: 050589
Enter Ending Date
Self-explanatory. This is a self formatting date field which is prompting for the ending date of the period of time for which you are requesting the selection of services posted to the patients account. The date of selection is based on the posting date of the claim not necessarily the service date.
EX. You want to select all transactions with an effective posting date ranging from 5/5/89 through 5/10/89. Your entry here will be:
ENTRY: 051089
Enter Classifications to Include
If you wish to execute this function for all of your patients; regardless of their classification, simply press return. Otherwise, in the event that you will like to execute this function for a specific class, or classes of patients, enter here the applicable internal patient classification codes, separated by commas. If at this time you do not remember the classification code needed at this time, you can click on the drop down arrow located in this field to see a list of your internal classifications codes. Choose your code accordingly.
Example: You want to execute this function only for all of your Private Insurance and Relative patients. The internal system codes are: PRIV, and REL, respectively.
ENTRY: PRIV,REL
Enter Classifications to Exclude
If you wish to execute this function for all of your patients, regardless of their classification, simply press return. However, in the event that you want to execute this function for all of your patients, except one or several patient classifications, then enter here the internal system codes that correspond to the patient classifications you wish to exclude. If at this time you do not remember the classification code needed at this time, you can click on the drop down arrow located in this field to see a list of your internal classifications codes. Choose your code accordingly.
Example: You wish to exclude from this function all those patients whose classification is FRIEND.
ENTRY. FRIEND
Note: You may leave both the Include and Exclude patient classification fields blank, and the system will base its selection on all patients that match the rest of the criteria. However, when you include only certain patient classifications, then consequently there exist nothing to exclude. The same happens when vice-versa, you decide to exclude certain patient classifications. For if you use or instruct the system to do both, include and exclude, that is really a contradictory statement, which would not be understood by the system.
Physician to Include
The next prompt, Physicians to Include, can be used to print claims for patients seen by certain physicians, not all. This prompt allows you control of the claim forms to be printed. That is, the system will only print claim forms for patients requested. In the event that your office submits claim forms for all patients; regardless of their physician simply skip over this field leaving it blank. If at this time you do not remember the physician needed at this moment, you can click on the drop down arrow in this field for a list of your internal codes for this physician.
Enter Carriers To Include
If you wish to generate claims only for one insurance company, then you may do so by entering the appropriate insurance company code in this field. “Carriers to Include”, can be used to print claims for patients with certain carriers, not all. This prompt allows you control of the carriers to be printed. That is, the system will only print claim forms for patients requested. In the event that your office prints claim forms for all patients; regardless of their carriers simply skip over this field leaving it blank. If at this time you do not remember the carrier needed at this moment, you can click on the drop down arrow in this field for a list of your internal codes for the carriers.
Print Both Carriers
Enter 'Y' if your office bills both the primary and secondary insurance carrier at the same time. Otherwise, enter 'N', in which event the system will prompt you (next subsection) to answer which type of form you wish to print, PRIMARY OR SECONDARY.
Primary or Secondary
If you entered yes, the program will disregard this field. If you entered No to the previous prompt, the system will ask you which insurance to print.
Reply 'P' if you are interested in printing the claim forms for the Primary Insurance Carrier. Otherwise, if interested in printing Secondary Insurance Carrier claims enter 'S'.
Do you wish to reprint?
If this is a reprint of insurance forms already printed enter 'Y'; otherwise, enter 'N'.
Note: If this is a reprint it will only print insurance forms for all of those services already marked or flagged by the system as having been billed.
Only Unpaid Services
This field will be disregarded by the system if you “N’ to reprint, if you entered “Y” then you will be allowed access to this field. This option will only be available for those practices using the line item posting function of the program. By answering "Y", the system will only print claims for those services, which have not been flagged as completed. Please refer to the section of the manual entitled "Transaction Management", specifically how to enter payments, for more information on how to mark services completed or incomplete.
Do you wish to combine Procedures?
By answering 'Y' to this prompt, you will be telling the system to combine the procedures of all matching, un-billed services, and asking to have them billed on the same claim form, provided that there is room available. Of course, the claim will denote the appropriate date of service entered per procedure through the Transaction Management section of this package.
Type of Service to Print
Enter in this field the appropriate internal system type code, which corresponds, to the type of service entries that you want to select for billing. In the case that you wish to bill transaction with a type of "I", then your entry here should be "I".
Print form for on-line transmission companies?
If at any time you wish to print a claim form for a company that is set up to be transmitted electronically, then you must answer "Y" here. Also if you are attempting to print a claim form for the secondary insurance, and the secondary insurance is a MEDIGAP, or complementary company to the primary then you must also answer "Y". This is useful when your office prints claims on a batch mode, and treats patients on recurring occasions during your claim period, for the same exact diagnosis.
Print for discharged Patients
This function will allow you to automatically bill all the patients that have been discharged from the hospital. This function will have no reference to the range of dates that you specified in the above questions, it will merely go to the patient record and find patients that have been discharged and are pending services to be billed. At this time it will generate claims for the pending billing.
Once you are content with the information that you have entered here, click on the OK button on this screen, or cancel in you do not want to continue with this transaction. Once you click on OK the system will commence preparing the report. You will see a window pop up and progressively see the report reach 100% .Your Printer properties window will then pop up and you will proceed to enter the printing specifications and send it to print. At the finale the computer will prompt you with a question: “Do You wish to print a summary for the claims?” If you want to print a summary of all the claims that you have just printed insurance forms for reply "Y" to this question. It is recommended that you print this report and store it for future reference of your filings.
You have the ability to process insurance forms daily weekly or individually by patient. Whichever way you decide to process your forms, you will notice the speed and efficiency that the system offers. Time that you would normally spend writing up claim forms can be used to perform more productive tasks.
II. Print Claim Forms for Secondary Insurance
When you bill the Primary insurance company of a patient who has two insurance policies the system will keep track if there has been any payment received from the primary insurance company. Once payment is received, from the primary insurance carrier, the system will allow you to print an insurance form for the secondary carrier. The system offers you a report that will tell you all the secondary insurance companies that need to be billed due to the fact that the Primary carrier has already paid. This report is called the Un-billed Secondary Insurance Report. This report will be covered in the System Reports section of the manual. Lets go over how to select insurance forms for secondary insurance companies.
From the Paper Claims related function column of the package, using your mouse click on the button that reads “Secondary”. Once you have selected this option, the system will prompt you with the following question to base its selection of forms to print.
Enter Ids separated by Comma
Enter here the ID# of a patient or of various patients that you are requesting forms for. If you are selecting patients within a range of time or for an specific patient classification then you do not need to specify the ID#'s. This field you will only be used in the case that you want to select forms for an specific patient or patients. Otherwise leave this field blank by clicking over onto the next field or by pressing <ENTER>.
Enter Starting Date
Self-Explanatory. This is a self-formatting, date field which is prompting for the beginning date of the period of time for which you are requesting the selection of services posted to the patients' account. This is a self‑formatting date field. Therefore, there is no need to enter hyphens or dashes.
EX. You want to select all transactions with an effective posting date ranging from 5/5/89 through 5/10/89. Your entry here would be: ENTRY: 050589
Enter Ending Date
Enter the ending date for the period of time you are requesting secondary or supplemental claims. If you want the system to automatically search for all claims already paid by the primary carrier; regardless of posting date, simply leave this field blank or enter the current date. This is a self‑formatting date field. Therefore, there is no need to enter hyphens or dashes.
EX. You want to print secondary claims for all those services posted between, May 1, 1989 through May 20, 1989, which have already been paid by the primary carrier. ENTRY. 052089
Enter Classification to Include
If you wish to execute the requested function for all of your patient classifications simply skip over this field by pressing return or clicking on the next field. Otherwise, in the event that you will like to execute this function for an specific class, or classes of patients, enter here the applicable internal patient classification code or codes, separated by commas. If at this time you do not remember the code you need, you can click on the drop down arrow located in this field and choose the appropriate internal code from your listing.
EX. You want to execute this function only for all of your Private Insurance and Relative patients. The system codes are: PRIV, and REL, respectively ENTRY: PRIV,REL
Enter Classification to Exclude
If you wish to execute this function for all of your patients regardless of their classification, simply press return or click on the next field. However, in the event that you want to execute this function for all of your patients, except one or several patient classifications, then enter here the internal system code that corresponds to the patient classifications you wish to exclude. If at this time you do not remember the code needed for this entry, you can click on the drop down arrow located in this field. Choose the appropriate internal code from your listing.
EX. You wish to exclude from this function all those patients whose classification is FRIEND. ENTRY. FRIEND
NOTE: When you include only certain patient classifications then you may not exclude, and vice-versa. Otherwise, if during the same request you specify both, include and exclude, it will be a contracting claim form to the system, and it would be ignored by the system.
Physician to Include
The next prompt, Physicians to Include, can be used to print claims for patients seen by certain physicians, not all. This prompt allows you control of the claim forms to be printed. That is, the system will only print claim forms for patients requested. In the event that your office submits claim forms for all patients; regardless of their physician simply skip over this field leaving it blank. If at this time you do not remember the physician needed at this moment, you can click on the drop down arrow in this field for a list of your internal codes for this physician.
Enter Carriers To Include
If you wish to generate claims only for one insurance company, then you may do so by entering the appropriate insurance company code in this field. “Carriers to Include”, can be used to print claims for patients with certain carriers, not all. This prompt allows you control of the carriers to be printed. That is, the system will only print claim forms for patients requested. In the event that your office prints claim forms for all patients; regardless of their carriers simply skip over this field leaving it blank. If at this time you do not remember the carrier needed at this moment, you can click on the drop down arrow in this field for a list of your internal codes for the carriers.
Do you wish to reprint?
If this is a reprint of insurance forms already printed enter 'Y'; otherwise, enter 'N'.
Note: If this is a reprint it will only print insurance forms for all of those services already marked or flagged by the system as having been billed.
Type of Service to Print
Enter in this field the appropriate internal system type code, which corresponds, to the type of service entries that you want to select for billing.
After you have completed your selection criteria questions click on the okay button. Once you click on OK the system will commence preparing the report. You will see a window pop up and progressively see the report reach 100%. Your Printer properties window will then pop up and you will proceed to enter the printing specifications and send it to print. At the finale the computer will prompt you with a question: “Do You wish to print a summary for the claims?” If you want to print a summary of all the claims that you have just printed insurance forms for reply "Y" to this question. It is recommended that you print this report and store it for future reference of your filings.
Why an Ins. Form Will Not Print
Key Notes:
When you select insurance forms to print, whether it is primary insurance or secondary insurance, and the system does not print them all or some there are usually a few things that you can look for to troubleshoot why you did not get an insurance form for those services. Hereafter is a list of things that you may look for:
1. On the service entry screen there is a field that reads the following.
<TYPE>
Your entry here should be "I". If the entry here is blank or there is a "C" you need to change this to an "I". If the type is other than blank, C, or I, then you need to request insurance forms for that type through the Insurance Processing section of the package. Remember to check what type is entered you retrieve a service in the Transaction related column of the package. You should check if the <TYPE> has been answered correctly. Once it is changed to an "I" or the appropriate type request the Insurance form again and the form should print.
2. The Patients demographical information file might not contain an insurance company for the patient.
To verify this go to the Patient Related Functions column of the system and execute the button that reads “Retrieve” function to retrieve a patient’s administrative record. If the patient record does not contain an insurance company code then you need to add one and then select to print the insurance form again. The form should print now.
3. The insurance company that the patient has in their patient record is set up to transmit claims electronically.
To verify this, first go to the patient demographic record and look up to see what insurance company the patient has. Once you know the code of the insurance company then go to the ‘‘System Codes" Section of the package and go to the "Insurance companies". Click on the list tab and find the appropriate code, then click on General and when you are in the screen that contains all the information for that code there is a question that reads the following:
Is this for on-line trans. ?
If the answer to this question is "Y", that means that this insurance company was edited to transmit claims electronically. If this is not true, then you need to change this to "N" so that the system will print paper claims for anyone with this insurance company. Once you have changed it select to print the insurance forms again and the system should print the forms.
4. When you were selecting the claim(s) the range of dates that you specified was invalid and the system did not pick up the service.
To verify that you specified the proper dates you should retrieve a patient ledger and find out what was the date of entry. If the date here differs from your selection, then simply select the claims again with the proper selection dates. The system should print your insurance forms now.
5. The additional patient information record says that "N" to send insurance forms for this patient.
To verify this go to the Patient Management Functions column of the program and click on “Retrieve” button, and retrieve the patients demographic file. Once you have retrieved the patient’s file, verify on the third tab that the question that reads "SEND INSURANCE" is answered "Y".
6. Patient is marked as being hospitalized.
You can verify this by going to the Patient Records section of the package and verify in their records if this patient is marked as being in the hospital. Note, that no insurance claim will print for this patient, until such time when the patient is discharged.
7. An insurance claim has already been printed for the specific service.
You can verify this information by pulling up an on-screen patient ledger (F-5), and double clicking on that service and the system will bring up the service details, that shows if the Primary and/or Secondary has been billed. If they have both been billed and you still need a copy of the claim, you may request a print by specifying to the system that this is a reprint, at the proper prompt.
The fore captioned are the main reasons why on occasions a claim might not print for a service requested. When this is the case, review this list, make sure you have adhere to all the situations previously described. You will find that during entry one of the fore was neglected; thus, resulting in the claim not being properly generated. Whatever the case, correct the error, and request the form again.