SYSTEM CODES
INTRODUCTION
The system codes section of this manual covers what is the building and maintaining of the internal system codes. Before beginning to enter any type of records to the system you must build a database containing all these codes. Some of the codes included are Diagnosis, Procedures, Adjustments, Insurance Companies etc. The codes are used throughout the system to make the data entry a more efficient job instead of a time consuming one. By using codes it minimizes the amount of entry that the user has to do, due to the fact that the system can pick up the information necessary for processing without the need for the user to enter all the details.
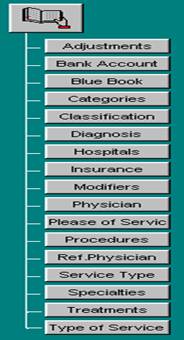
The user will be allowed to name the codes in order for him/her to get accustomed with the type of codification that will be used throughout the system. Throughout the system you will have easy access to the codes by means of a Pop Up Window Display (you will see this function in later sections). The system also allows you to edit the codes as the user sees necessary. This is also the section of the package in which you will set up the different fee schedules, CPT numbers, and specifications according to each procedure. You will also be setting up the different Diagnosis codes with their ICD numbers accordingly. The other type of information that you will be entering in this section is the different modifier codes that will be used in the practice, Hospital information for the hospitals where the doctor render services, the different Physicians that will be conducting services in your practice and their related information, the different type of monetary adjustments that you will be used to alter patients accounts, etc... Also please note that although at this time you will be creating your data bank of system codes, the system has the ability to add codes at the time that you are processing your patient’s information, or even at the time that you are entering transactions to their accounts. For example, if you are entering a service rendered to a patients account, and you realize that the diagnosis that you need to bill the patient is not in your system codes file, by entering the code at that time the system will prompt you if you wish to add it, at this time if you answer "Y" the system will then bring you to this section of the program, and will allow you to add the code to the system files. Once finished the system will then return you to the place that you were entering information to the patients account, and you may continue working without having to have left the section that you were at. Lets not talk anymore about what we are going to do, and lets begin entering the appropriate information. When you first turn on your system the Main Menu will greet you. The System Code Column is the column on your main menu. In this section you will have the ability to choose which type of code do you wish to begin entering or editing. These are the following options
 I.
I.
Adjustments
Bank Accounts
Blue Book
Categories
Classification
Diagnosis
Hospitals
Insurance
Modifier
Physician
Place of Service
Procedures
Ref. Physicians
Service Type
Specialties
Treatments
Type of Service Figure G.1
Once you have
selected the type of system code that you wish to work with, you will have two
tabs to work with, the edit tab and the list tab.
List
<>From here you choose the code you desire to Edit or Delete. Using your mouse or arrow keys choose the needed code. From here you can also click on find and the system will bring up a window where you can enter the code you are searching for. Once you have it highlighted or selected move on to click on the edit tab.<>Edit <>When you click on this tab , you will have the following options you can do to the code, Print, Delete or Add. If you want find another code there is a button on this window that you can click on and you will have the ability to search for another code. Once you have done the proper editing you click on save, the on OK to go back to the main screen of the program. <> <>.Every code has up to a maximum of six alphanumeric characters. This means letters, numbers or symbols. It is not necessary to use all the six characters, the user has the option, as a fact it is recommended that you use the least amount of characters per code, as long as you keep it meaningful. <> <>Note: On each Code screen, where the list and edit tabs are located you can choose to sort code by description or by code. This will be default in “Tailor System to User” (later explained in this manual) but can be changed when you have the screen in front of you. If you want to sort by code double-click on the actual word “code” and vice versa if you want to sort by description. <> <>Lets begin with; <>
I. Adjustments
<>This is the section of the package in which you will set up the different types of adjustments that your practice will be using. Some examples of adjustments that your practice may use are, Medicare disallowance, Bad debt write off, Courtesy discount etc... The system will allow you to request analytical reports for the codes you will be entering now. Choose the button that reads ” Adjustments “ from the System Codes Menu. Once you are in the screen of the Adjustment Codes the system will prompt you for the following information. <> <> <>Description Of Adjustments: <>Here you should enter a Brief Description of the Adjustment that you are entering. <> <>Credit (+) or Debit(-): <>If the adjustment is going to subtract from the patients balance then you must enter "D" for Debit, if this Adjustment will add to the patients balance then enter "C" for Credit. <> <>EX: A bad debt write off will be a "D" debit since it will be subtracting from the patients balance. A Refund to a patient will add to the patients balance so it would be a "C" Credit. <>Statement Flag
<>Enter “Y” here if you do not want this adjustment to show on the statement when zero. Otherwise enter “N”. <>II. Bank Accounts
<> <>This is the section of the package in which you will tell the system, which are the banks that you will be depositing monies into. Choose Bank Accounts from the System Codes Menu. Now enter the code that you wish to assign to the bank, which you are entering. By entering your banks here and later using these codes when entering payments the system will allow you to print out daily and periodic Deposit Reports. The fields in this section are self-explanatory but you may hit the F-1 Key at any field to get an explanation of what that specific field requires for entry. <> <>III. Blue Book Maintenance
<> <>A Blue Book is a table, which maintains in detail, the amounts that certain insurance companies will allow and actually pay for each and every procedure rendered by your practice. This option is available in the system. By entering this information in the Blue Book the system will be able to default and display for you the amounts that insurance companies should pay you for certain procedures, at the time of entering payments. This information will be very powerful, in assisting you in assuring that your practice is being fully compensated for its services performed and helping you in identifying how much you should collect from the patient as the services are rendered. To add a procedure code to the blue book select from the "System Codes" menu the function that reads "Blue Book". Once you selected the code that you wish to edit the system will then bring up the "Blue Book Codes" entry screen. In this figure you will see all the information that you will be prompted for. Lets go over the different entries in this screen. <> <>Procedure Code: <>Enter here the procedure code that you wish to enter in the Blue Book. For a listing of your systems internal procedure codes, associated to the Procedure codes file, click on the drop down arrow in this field and the system will give you a pop-up-window display of all the available codes. You may now select the code by either moving the cursor on the window to the desired code, or by pressing ESC and then typing in the code. <> <>Carrier: <>Enter here the insurance company code for the company for which you want to register the above procedures information. To get a listing of the insurance companies in your insurance company code file, click on the drop down arrow in this field and the system will give you a pop-up-window display of all the available system insurance company codes. From this listing choose the appropriate code. <> <> <> <>Allowed: <>Enter here the amount that the insurance will allow for this procedure. <> <>Paid: <>Enter here the amount that the insurance company should pay for this procedure. This amount the system will use in order to automatically calculate the write off amount when entering insurance payments to the patient’s accounts. <> <>Authorization : <>Enter "Y" here if this procedure requires authorization from the insurance company prior to being performed, in order to receive payment. <> <>Once you are done entering the information for this code click on save and that code will be added or edited based on the information that you have entered. <> <>The blue book can be a very powerful collection tool if maintained up-to-date. It can assist you incredibly in assuring that your insurance companies are not under paying on any services rendered. This can improve the income of your practice by reducing the insurance company underpayment errors, which will otherwise go undetected.
IV. Categories
<> <>Choose "Categories" from the main menu in the program in the “System Codes” area of the package. This is the section of the package in which you will define to the system the different types of Procedure Categories for your practice. By setting up categories for your procedures, the system will allow you to analyze the production of your practice by department. For example, your practice wants to know how much revenue the category of office visits in comparison to the category of lab made for the year. By properly categorizing your procedures the <>system will allow you the capability to request these reports. Here are some examples of some procedure categories. <> <>EX: Laboratory Work, Office Visits, Surgeries etc... <>Select A, then A to Edit Codes. <>The system will prompt you with <> <>Find Code to be Edited: (EXAMPLE) LAB <> <>Note: You have up to six Characters for the code that you wish to use. <> <>If the code already exists bring up the information for that code if not choose the add option, if you are going to add or edit the following are the fields you will have to enter information for. The screen, which will prompt you for the description of the code. Here you will enter the description of the particular Procedure Category, Which you're entering at the time. <> <>EX: Laboratory Work (description) <> <>Once you are done entering the information for this code click on save and that code will be added or edited based on the information that you have entered. <>V. Patient Classification
<> <>This section is probably the most important section of the package due to the fact that this is where you will decide how to manage your different types of patients. The reason that this is so important is due to the fact that whenever printing reports or selecting any output (such as claim forms) the system will give you the capability to request it by patient classification. Your practice can classify your patients by their financial category or any other type of way that your practice deems proper and productive. Here are some examples of what you can use for your patient classifications. <> <>EX: you can have a classification for the patients with private insurance, and one for the ones with private and secondary; <>Example codes:PRVINS; Private Insurance <> PRVSUP; Private Insurance/ Supplemental <> <> <>To enter this section, choose Classifications from the main menu of the program from the “System Codes” section of the package. Now find the code you want to edit or click on add to crate a new one. <> <>EX: Patients with private Insurance. You may choose a code similar to this one. PRVINS. <> <>Description Of Code: <>Enter here a description of the code that you are entering. (Private Insurance Patients). <> <>Default Price Level: <>Enter here the number of the fee schedule from which you would like to charge for services to the patients under this classification. If you have entered a fee schedule number for the Insurance Company of this patient that will override this entry. Remember that you will have the ability to change <>the prices when entering services to any patient so your decision here is not final. <> <>Ask For Due Date: <>In the event that you wish to keep track of a due date for the patients that have the classification that you are entering at this moment enter "Y" here. <> <>Are Services Work Related: <>Enter here "Y" if the services that will be done to patients with this classification, are work related. <> <>Once you are done entering the information for this code click on save and that code will be added or edited based on the information that you have entered. <>
VI. Diagnosis
<> <>Choose "Diagnosis" from the main screen of the program, in the “System Codes” column of the program. If the code already exists bring up the information for that code if not choose the add option, When you are going to add the new code or edit one you have the system will prompt you for the following answers. <> <>Description: <>Here you must enter the description of the Diagnosis, which you are entering. <> <>ICD Number: <>Enter here the appropriate ICD Number, which corresponds, to the Diagnosis being entered. The entry of a correct number in this field is strictly the responsibility of the user. <> <>Is this code obsolete: <>This entry works in the same manner as that of the procedure code file, for the flagging of obsolete codes. If at any time you desire not to continue using a certain diagnosis, you may specify this to the system by answering "Y" to this question. At no time should a diagnosis code be deleted from the system if it has been used before. If a code is deleted and it had been used before, any entries containing this code will no longer have a definition of that particular code. This rule applies to all codes in this section. <> <> <>Once you are done entering the information for this code click on save and that code will be added or edited based on the information that you have entered. <>VII. Hospitals
<> <>This is the section of the package in which you will tell the system, which are the Hospitals, and other places outside the office in which you will be conducting services at. Choose Hospitals from the main menu of the package in the “”System Codes” column. Now you may add the code that you wish to assign to this Hospital, if the code has already been used edit the fields The system will prompt you for some information about the Hospital, or place of service. All the fields in this section are self explanatory but you may hit the F-1 Key at any field to get some more information about what the field requires for entry. These codes will be used when posting services that were rendered outside your office. <>VIII. Insurance Companies
<> <>Choose "Insurance companies" from the main screen of the program in the “System Code” column. Once you have chosen the code that you wish to edit the system will then display the Insurance Company Codes Screen. <> <>Other than the list tab there are two other tabs on this screen:A. General
B. Numbers
<>General
<>The system will first prompt you for some demographical information about the Insurance Company or the type of Payment Code, such as the description, address, phone#, etc.... Enter here all the corresponding information. <> <>Also on this screen you will enter information for the following fields: <> <>Stm Wait Flag <>This field will tell the system, if a patient has this insurance company or payment code do you wish to show the services rendered on a statement only after the company pays or at all times. If you answer "Y" the system will only print the services on a statement after this company has paid them. If you answer "N" the services will always appear on a statement regardless of their status. <> <>EX: you may want to answer "Y" in the case of Medicare in which you might not want to show the services that have not been paid on a statement until Medicare pays. <> <> <>Stm Wait Days <>This field works in conjunction with the fore captioned prompt. If you replied 'Y' to Show on statement only after this company has paid, here you can instruct the system to show said services on the patient statement, regardless of the insurance payment, whenever the payment has not been received from the insurance company within the number of days hereby specified. <> <>This is useful when your office accepts assignment and wants to withhold reflecting the charge on the patient statement until the insurance company has paid. However, if the insurance payment is not received by the period hereby specified you want to make sure that the system will capture the charge and reflected on the next patient statement. After all, the patient or its responsible party, is finally responsible for any and all charges incurred. <> <>In the event that your office never wants to reflect a charge on a patient statement until payment has been received from the insurance carrier; regardless of aging, enter 0 in this field. <> <>Here is an example of how this field works. <> <>Your office withholds reflecting charges on the patient statement until Aetna Life Insurance has paid. However, in the payment from Aetna is not received within the first 90 days, you want to advise the patient of the outstanding charge. Your entry here will be: <> <>ENTRY: 90 <> <> <>Cash/Insurance <>If you are entering an Insurance Company then your entry here must be "I", if you are entering anything other than an insurance company your entry here must be "C". <> <>EX: Prudential of Massachusetts = "I" <> <>Type Of Payment: <>In this field you will identify to the system what type of payment you will be receiving from this company or payment code. The four choices are; <>1. Check 2. Cash 3. Credit Card 4. Other <> <>Accept Assignment: <>Enter here if you will be accepting assignment of payment for patients with this insurance company. Answer "Y" or "N". Your answer here is important for the purpose of generating your claims. <> <> <> Percentage paid by company: <>Enter the percentage of the amount allowed that this insurance company will pay you for services billed. The proper entry in this field will facilitate and reduce your possibilities of receiving payments erroneously from your insurance companies, due to the fact that the system will automatically calculate for you the amount that the insurance company should have paid for any particular service. This amount will be used when using the "Insurance Payment" function of the system. Please refer to the section entitled "Transaction Management" of this manual for more information on using the "Insurance Payment" function of the system <>G/L Bank Account Number to Use
<>This field is self-explanatory. Enter here the G/L Bank account number to use when posting payments with this insurance company. In order for the system to default to the entry in this field you must first specify that it reads it from the insurance company not the service type, and this is done in the “Tailor to User” section of the package, later explained in this manual. The other condition that must be true is that you must use the proper payment source code at the time that the payment entry is made. If this field is blank and the system profile says to read it from here, the system will then read it from the default code in the profile. <>Show on Aging
<> This field is self-explanatory. Enter “y” if you want the insurance company to show on the aging report even after paid. <>Show on Stmnts
<>This field is self-explanatory. Enter “y” if you want the insurance company to show on the statement even if zero. <>Numbers
<> <>Price <>Enter here the number of the fee schedule from which you want to bill your patients who have this insurance company or payment code. <> <>EX: If you are entering Prudential and you have your insurance companies to be billed from fee schedule 1 then your entry here should be "1". Remember these fee schedules are the ones you set up while entering the procedure codes into the system. <> <>EX: Prudential; your entry: "1" <> Cash ; Your entry: "2" <> American Express; Your entry: "3" <> <> Dr’s Prov./Insurance <>If the Insurance Company that you are entering requires that you send your claims with a specific provider number you must enter it here. <>Payor Number
<>This field is self-explanatory. Enter here the Electronic Payor Number. <> <>Def. Dissalow <>Enter here the default insurance disallowance code for this insurance company. This will allow you to tell the system at the time of entering an insurance payment, what the disallowance code should be. By entering the proper disallowance code in this field the system will at the time of entering an insurance payment, automatically default to the disallowance code entered herein. Thereby making more efficient and quick, the entering of payment and disallowance information to your patients accounts. <>Show Mod on Claims
<>This field is self-explanatory. Enter here “Y” if you want the modifiers to show on the claim form. Otherwise enter “N” Some companies may require that no modifier show on the form, otherwise the claim will be rejected. <> <>These questions must be answered by replying according to the corresponding answers for the insurance company hereby being entered. <> <>Is this for on-line Trans.? <>Is This Medicare? <>Is This Medicaid? <>Is This BcBs ? <>Is This an HMO? <> <>Is This Complementary to Medicare? <>Is this member of Medigap? <>Medigap Number? <> <> <> Once you are done entering the information for this code click on save and that code will be added or edited based on the information that you have entered. <> <>IX. Modifier Codes
<> <>In this section you will tell the system the modifier codes that you will be working with in your practice. <>To enter this section by choosing the button that reads “Modifiers” in the main menu of the program in the “System Codes” column. Once you have found the code you want to edit or want to enter another one, the Modifier Code screen will have fields for you to enter the following information: <> <> <>Enter Code To Be Edited: <>Here enter the two-character code for the modifier <>that you wish to add or edit. <> <>EX: LT (for left side) <> <>In this section only a description of the code is necessary, once you enter the information for this code click on save and that code will be added or edited based on the information that you have entered. <> <> <> <> <>X. Physicians
<> <>This is the section of the package in which you will tell the system, which are the physicians that will be conducting services in your practice. To add or Edit codes in the system choose Physicians, in the main menu of the program in the “System Codes” column. Once you have found the code you want to edit or want to enter another one, The system will prompt you for some information about the doctor such as Medicare number, and Medicaid Provider Number, Address and other general information. All the questions in this section are self explanatory, but if you wish to get some more information about a specific field you may hit the F-1 Key and a Pop Up Window will appear with an explanation about the field. You will set up a different code for each Physician, which you will use later on when you are entering transactions in order to tell the system, which is the doctor who conducted the service. By specifying which doctor did what the system will give you the capability to request production, analytical, and other reports which will be printed from the System Reports section of the package. <> <>XI. Place of service
<> <>This is the section of the package in which you will tell the system what is the Place of service, outside the office in which you will be conducting services at. Choose Place of service from the main menu of the package in the “”System Codes” column. Now you may add the code that you wish to assign to this Place of service, if the code has already been used edit the fields The system will prompt you for the code and description of the Place of service. These codes will be used when posting services that were rendered outside your office. <>XII. Procedure Codes
<> <>Choose "Procedure codes" in the main menu of the program in the “System Codes” column. <>Once you have the screen with the code that you wish to edit or add, the system will prompt you with. All the questions hereafter explained for procedure codes editing. Lets begin with the first question on the screen: (after the actual code) <>. <>Description: <>Enter the description of the code that you are entering information for <> <>Example: Office Visit Comprehensive <> <>Fee 1: Through Fee 6: Here you will enter the different fee schedules for your practice. <> <>EX: you may choose to have (Fee 1:) for your insurance companies, and (Fee 2:) for PPO customers, and Maybe (Fee 3:) for Family Members of the Doctor. <> <> <>Note: When entering services you will be allowed to override these prices. <> <>Fee 1: 100.00 Fee 2: 85.00 Fee 3: 20.00 <> <>The system allows you to enter up to six fee schedules but it is not a requirement to enter fees for all six schedules. <> <> <>Allowed <>Enter here the amount that Medicare will allow you for this procedure. This amount will be used to reference at the time of entering payments, how much Medicare was supposed to allow you for certain procedures. This field does not need to be used if you will be using the Blue Book mtce. function of the system. Please refer to the section of this chapter that covers blue book maintenance. <>Cost
<>Enter here the cost of performing this procedure for your internal use. This cost will not reflect on your billing, this cost will only be for your internal use. <> <>Category: <>Here you will enter the Procedure Category in which this specific procedure is to fall under. The entry here is based on the procedure categories, which you set up prior to doing this. <> <>Note: If you don't remember the codes that you set up you may put a question mark (?) and then hit the ENTER KEY to get a Pop Up Window Display of the codes that are in the system. <> <>CPT Number: <>Here you will enter the CPT Number that corresponded to the procedure hereby being entered into your system. Please note that the entry of an appropriate number in this field is strictly the responsibility of the user.Type of Service
<>Enter here the number that goes on box# 24c on the HCFA-1500. Refer here for better understanding of this field. <> <>Default Diagnosis: <>If the procedure you are entering at this time has a diagnosis that always associated with it, then you can enter the code for the diagnosis in this field. For a listing of the codes that you can enter here type in a question mark (?) and ENTER, and a pop up window display will appear displaying all the diagnosis codes in your system. This function will assist you so that when you enter a service to a patient account with this procedure the diagnosis will automatically be entered for you by the system. Thus, eliminating the room for errors while entering the daily services where a procedure might be accidentally associated to a diagnosis non-acceptable by any insurance company. <> <>Default Modifier: <>This function works the same as the default diagnosis. If you have a modifier that is always associated with a certain procedure then you can enter it here and have the computer automatically pick up that modifier any time you enter a service with that specific procedure. This function will be implemented when doing a Quick Service entry. We will cover this function in the Transaction Management section of this manual. <> <>Default Place of Service: <>This function works just like the default diagnosis, and the default modifier. If the procedure that you are entering has a place of service that is always associated with it then you can enter it here. For example if you have a Hospital Consultation that you know will always be done in the hospital then you can set the default place of service at "1" that means Inpatient Hospital. A listing of the places of service is on the back of the standard AMA forms. This function will be implemented when doing a Quick Service entry. The Quick Service entry Function is covered in the Transaction Management section of this manual. <> <>Authorization <>Enter "Y" if this procedure requires authorization prior to the procedure being performed. Otherwise enter "N". Also please note that if you are using the Blue Book function of the system, and if you answer "N" here the system will then base its decision on the authorization requirements by your answer in the Blue Book. The answer in this section or in the Blue Book will either allow you to enter an authorization number while entering a service to the patients account, or it will not prompt you for that information. <> <>Lab Work <>Enter "Y" if this procedure is Lab Work. This section works in conjunction with position 22 of the standard AMA form. If you answer "Y" the system will mark an "X" in this position whenever an AMA form is printed with this procedure. <> <>Is this code obsolete ? <>If at anytime you decide to no longer use a particular procedure code, you should answer "Y" here to let the system know that this code should not be used. If at anytime you attempt to use this code to bill a patient’s account, the system will immediately notify you that the code is obsolete. <> <>Note: that this function was specially added, given that at no time should a code that has been entered and used for billing be deleted from the system. Due to the fact that if the code is deleted and the system needs to refer to this codes for any reporting, billing or analytical reason, all of a sudden the code would not be found. Therefore no information for reporting would be found. <> <>Units of Time ? <>This field is used to measure the units of any particular measurement of time that it will take to perform this procedure. Units of time may be whatever you define it to be (Minutes, Hours etc...). Your office for practice evaluation management could then use this information. As your end of day report, will not only show how much was done today, but based on the information entered for each code, will show how many units of time were billed. This information is very important in order for you to analyze what is your average daily and hourly work time. <> <>Need Ref. Phy. <>Enter here "Y" if this procedure that you are entering requires a referral source to be entered. By answering "Y" the system will prompt you at the time that you are entering services to a patients account if a referral is required. Properly answering this question will assist you in reducing any rejections of claims for invalid or missing information. <>FDA Certification Number
<>This field is self-explanatory. Enter here the FDA Certification Number. <> <>Once you are done entering the information for this code click on save and that code will be added or edited based on the information that you have entered. <> <> <> <> <> <> <> <>XIII. Referring Physician
<> <>This is the section of the package in which you will tell the system that are the Physicians, and what are the types of referral sources that send patients to your practice. Choose “Referring Physician” in the main menu of the program in the “System Codes” column. Use the codes as you see fit for your practice. Once you have chosen the code to edit or want to add, the system will ask you for some general information about each doctor including the Provider UPIN Number. The provider UPIN number that you enter here will print on the Insurance form. Remember that it is a requirement of Medicare that the Referring Physician's UPIN Number be put on the Claim form. These codes will allow you to obtain analytical reports by referral source. All the questions in this section are self explanatory, but you may hit the F-1 Key at any field and the system will give you an explanation of what the field requires for entry. Once you are done entering the information for this code click on save and that code will be added or edited based on the information that you have entered. <> <> <> <>
XV. Service Types
<>Choose Service Types, in the main menu of the program in the “System Codes” column. This section of the package is responsible for maintaining the internal service type codes utilized by your office. The standards included with the package are: <> <> I - Insurance <> C - Cash (No Insurance) <> H - Hold on Insurance <> <>The service type code is utilized in conjunction with the service entry to describe whether or not you want a claim printed for the services entered. This may also be used to segregate certain claims from printing with the same frequency as others because of your office set up. <> <>In addition you may wish to add other service type codes to further distinguish your claims. <> <>EX: S - Surgeries, P - Hospital Services, etc... <>Once you are done entering the information for this code click on save and that code will be added or edited based on the information that you have entered. By properly classifying your claims you will be allowed to manipulate the data of your office, as you will have the capability to select for billing only those claims marked as a particular type. <>XVI. Physician Specialty
<> <>This code is used to classify the different physician specialties, of both the referring physicians, and the performing physicians in your practice. This code will later be entered into the physician codes and the referring physician codes. To add codes to this file select " Specialties” in the main menu of the program in the “System Codes” column. Once you have selected the code to enter or edit the system will ask you for the following; (after entering the code desired) <> Description: <>Enter here the description for the physician specialty that you are entering at this time. For example if you are creating a physician specialty code for "OPHTH" then your entry here should be; OPHTHALMOLOGY <ENTER> <> <>Once you are done entering the information for this code click on save and that code will be added or edited based on the information that you have entered. <> <>XVII. Treatment Codes
<>The treatment codes of the system are to allow you to enter various procedures that are performed together yet billed separately, into one code. The purpose of this code being, that rather than having to enter multiple procedures at the time of billing for a group of procedures that are always performed together, you can type in one code and the system will automatically generate a claim for all the individual procedure codes. One example can be "New Patient Standard Procedures" (Blood Test, Urine Test, X-ray's, and Throat Culture etc. Lets go over how to create these treatment codes. <> <>Note: Please be reminded that if at any time a procedure within a treatment was not performed, you cannot use this treatment code to bill the patient. Otherwise you will bill for procedures that were never performed. For information on how to enter treatment codes, refer to the "Transaction Management" section of the manual. <> <>Once you have selected from the menu "Treatment Codes" in the main menu of the program in the “System Codes” column. Once you selected the code you want to edit or entered (six character) the one you have to add the system will then prompt you with the following. <> <>Description of treatment: <>Enter here a brief description of the treatment code that you are entering at this time. For example if you were adding the code "NEWPAT", a good description would be "NEW PATIENT STANDARD TREATMENT". <> <>Now the system will allow you to enter up to twelve procedures for one treatment code. In each line you will enter the appropriate internal system procedure code that corresponds to the treatment that you are entering at this time. If you do not remember your internal procedure code, you can click on the drop down arrow in this field and the system will display a window with all the available system procedure codes. You do not have to use all twelve procedures, use as many as you need to complete your treatment. Once you selected the code you want to edit or entered (six character) the one you have to add the system will then prompt you with the following. The treatment entry function can be very time saving in entering services rendered to your patient accounts. Although you must assure yourself that when using treatment codes that all the procedures within the treatment where performed, otherwise you will be billing for unperformed procedures. <>
XVIII. Type of Service
<> This field is self-explanatory. Enter here the number that goes on box# 24c on the HCFA-1500. Refer here for better understanding of this field. <> <>
SUMMARY
<>We have now completed the section on the entering and maintaining of your practices Internal System Codes. Remember that you will be allowed to edit these codes at any time that you see necessary. When we begin entering Patients into the system, and transactions for those patients, you will see how all of these codes will come together to make your work easier and more efficient.